Quick B2B brief. This SOP answers how to clean nail tools in a salon setting end-to-end: the four-stage nail tool cleaning protocol (pre-clean / clean / disinfect / sterilize), exactly how to disinfect nail tools between clients with EPA-registered tuberculocidal solutions, tool-by-tool sub-protocols (metal implements, files, buffers, brushes, drill bits), a frequency table, and the salon nail tool SOP language to put into your staff handbook. Used together it is a full cleaning nail tools between clients playbook — the practical answer to how to clean nail tools safely in a high-volume salon.
Cleaning nail tools properly is not one step — it’s four, in a fixed order, with a different sub-protocol for nippers, files, brushes, and e-file bits. Salons that get inspection citations almost always fail the same way: they jump from “rinsed in water” to “back in the drawer,” skipping the clean-then-disinfect-then-dry sequence that the rule actually requires. This guide is the wall-poster version of that sequence — written for salon owners and chain operators who need a SOP staff can actually follow, plus the tool-by-tool details that the general framework leaves out.
It’s the practical companion to our two reference guides. If you need the regulatory frame (state-by-state rules, decision matrix, equipment tiers) start with the nail salon tool sterilization compliance guide. If you’re picking hardware, see the UV sterilizer cabinet buying guide. This page is the procedure that ties them together.
The Four-Step Salon SOP — Clean, Disinfect, Dry, Store
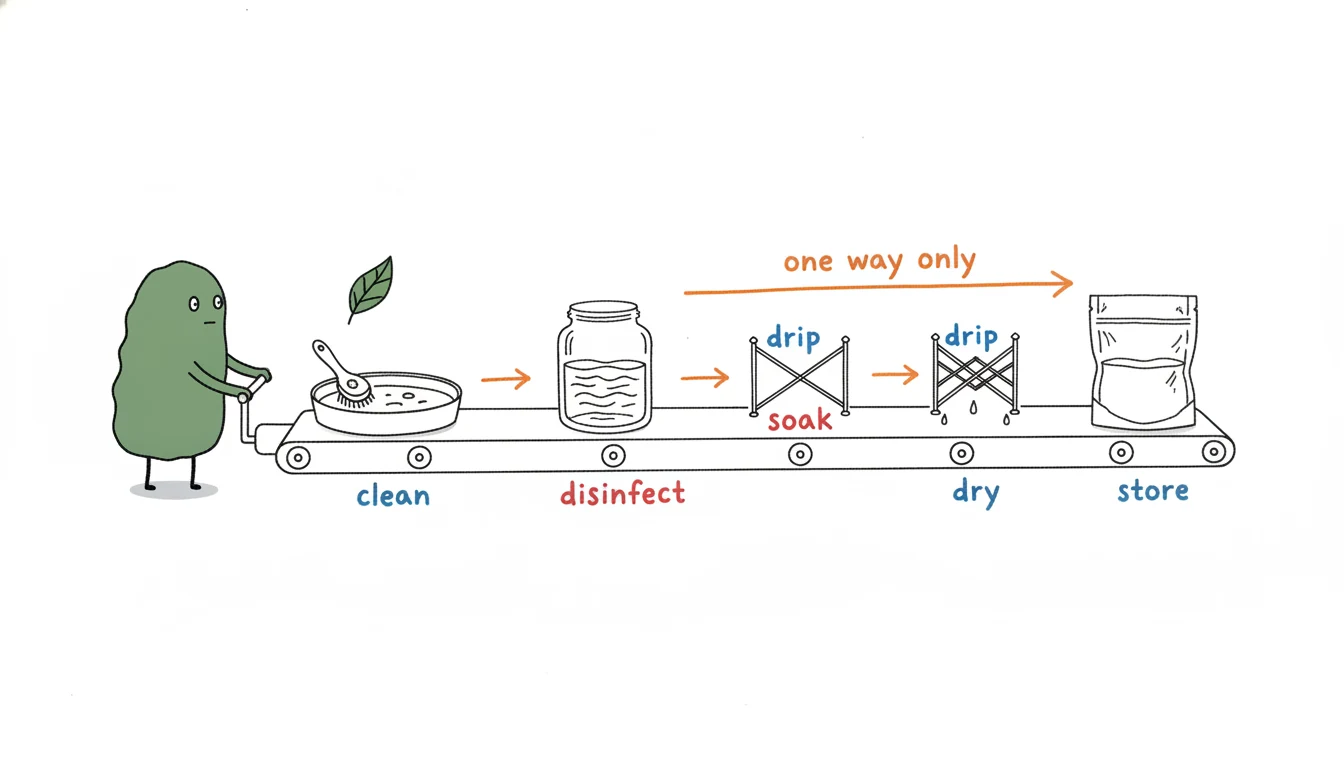
Every reusable tool goes through these four steps between every client. The order is not optional — organic matter (skin, oil, product residue) physically shields microorganisms from both UVC and liquid disinfectants, so a tool you “disinfected” without cleaning first is still contaminated. Walk staff through it in this exact sequence:
Step 1 — Pre-Clean (Remove Visible Debris)
Immediately after the service, before residue dries on, brush or wipe each tool to remove visible product, dust, oil, and skin debris. For acrylic and gel residue, a quick monomer or brush-cleaner wipe; for general residue, warm water with detergent and a stiff manual brush works. This step is mechanical, not chemical — you’re trying to get a tool that looks clean before it goes into disinfection. Skip this and the rest of the protocol underperforms.
Step 2 — Clean (Detergent Wash or Ultrasonic)
Full immersion in warm water with a salon-grade detergent, scrubbed manually or processed in an ultrasonic cleaner for the cycle on the label. Ultrasonics shine here for textured items (etched nipper jaws, file grooves, ferrules of pre-soak-safe brushes) where a manual brush can’t reach. Rinse with clean water afterward — detergent residue interferes with the next step.
Step 3 — Disinfect (Hospital-Grade Liquid or UVC)
For most reusable tools, immerse fully in an EPA-registered hospital-grade disinfectant for the contact time on the product label (typically 10 minutes, but always check). The solution needs to be made fresh daily, dated, and visibly free of debris — if it’s cloudy or has tool residue floating in it, replace before use. Cover the container.
For items that can’t be soaked (handpiece bodies, station surfaces, lamps, phones) or as the fast between-client step after a liquid soak, a UVC cabinet finishes the surface treatment in a few minutes. Critical instruments (anything that can draw blood) need heat sterilization — autoclave or equivalent dry-heat — in addition to, not instead of, the liquid step. The boundaries between these are the same boundaries your state board enforces; the sterilization compliance guide walks them in detail.
Step 4 — Dry & Store
Wet tools in storage are a biofilm party. Either run a low-temperature dry cycle (most multi-tray UV cabinets include one) or air-dry on a clean, lint-free surface before tools go into a covered, dated drawer or pouch. Anything autoclaved should go into a sealed sterilization pouch immediately and stay sealed until the next use; once opened, the sterility window closes.
Tool-by-Tool Sub-Protocols
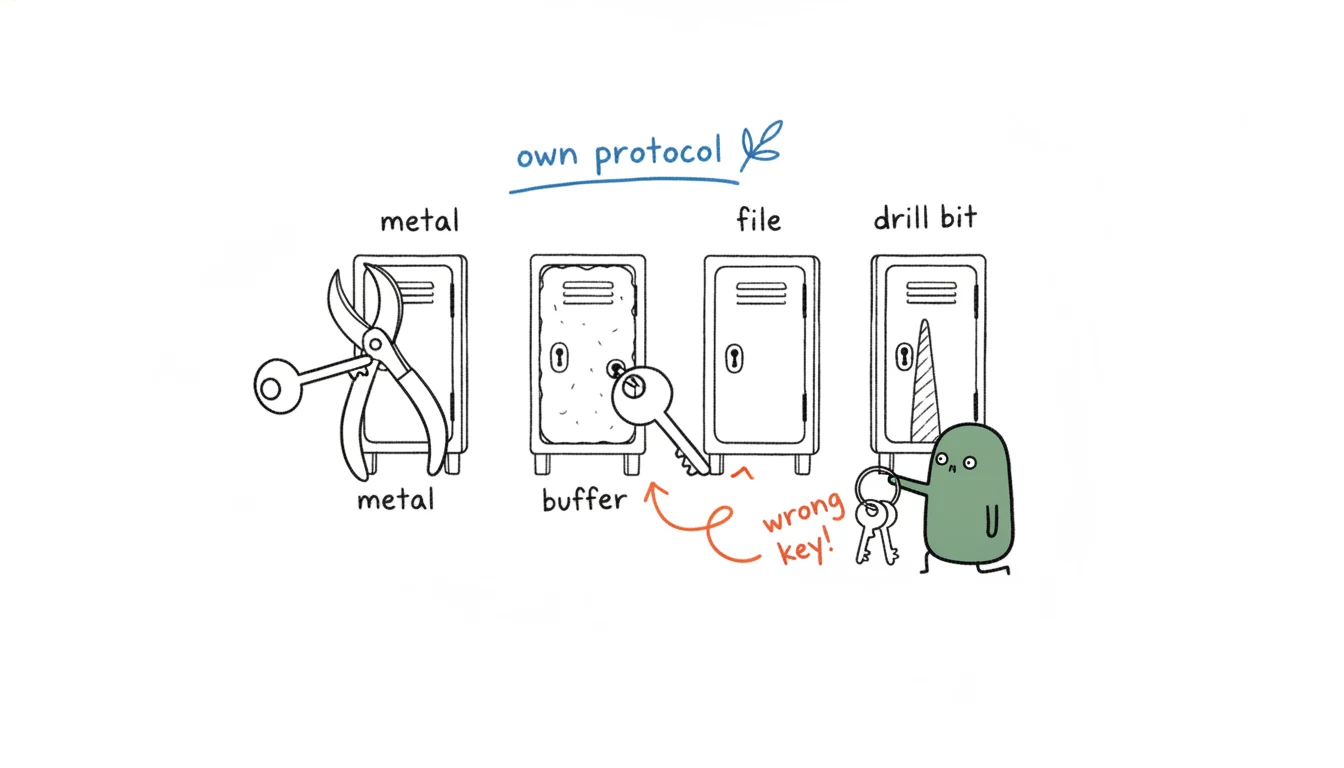
The four steps are the spine. Different tools need different choices within each step. Here are the specifics for the items you handle most.
Cuticle Nippers, Pushers, Scissors
Critical category — these can draw blood. Full four-step process, and Step 3 needs both liquid disinfection and heat sterilization (autoclave or dry-heat) if your local rules require it. Keep enough sets in rotation that one set can complete a full sterilization cycle while you continue working — a single set of nippers is a workflow trap. Hinged tools need to be opened during the soak and the autoclave cycle so disinfectant and steam reach the joint.
Files, Buffers, Orangewood Sticks, Pedicure Liners
Single-use category. Don’t try to clean these — bin them after one client. They’re inexpensive enough that the time spent attempting disinfection is worth more than the unit cost, and porous items (foam buffers, paper files, wooden orangewood) can’t be reliably disinfected anyway. This is the entire reason the disposable nail supplies range exists at wholesale price points — for salons replacing reusables with single-use SKUs to simplify the protocol and de-risk inspections.
Nail Brushes (Kolinsky, Synthetic, Gel)
These don’t follow the standard cleaning protocol because soaking destroys them. The ferrule is glued; solvent wicks into the joint and bristles fall out. The protocol is:
- Acrylic kolinsky brushes: wipe bristles with monomer on a lint-free wipe, work residue out on a paper towel, reshape the tip, store bristles-down or flat on a rest. Never submerge.
- Gel brushes: brush cleaner (the manufacturer’s recommended one — generic IPA can swell synthetic bristles) on a wipe, same routine. Keep them out of direct UV when not in use, or the gel cures inside the bristles.
- Natural-bristle body and pedicure brushes: these do follow the standard four-step protocol — detergent wash, hospital-grade disinfectant soak, dry flat. Replace when bristles soften or splay.
If you’re sourcing reusable brushes for a chain, build the SOP around brush type, not “brushes” as a single category — see our nail brush wholesale range for the kolinsky, synthetic, and accessory options.
E-File (Nail Drill) Bits
The most overlooked item in most salons. Bits are small, easy to forget, and exactly the kind of textured metal where between-client cleaning matters. The protocol:
- Pre-clean immediately after use with a stiff manual brush or compressed air to remove acrylic/gel dust and skin debris.
- Ultrasonic clean with detergent — bit grooves trap residue that a manual brush can’t reach.
- Disinfect: hospital-grade liquid for the labeled dwell time. Carbide and most diamond bits also tolerate autoclave — confirm with the supplier before assuming. UVC is acceptable as the surface step for between-client cycling but isn’t sufficient alone for any bit that could break skin.
- Dry fully and store in a covered tray, not loose in a station drawer.
Stock at least two sets of every bit you use daily, so one set can run a full cycle while the other is in service. Bit storage trays are inexpensive and reduce cross-contamination. Our nail drill range includes bit sets sized for distributor and salon-chain ordering.
Handpiece Bodies, Lamps, Station Surfaces
Can’t be soaked. Wipe-down with 70% isopropyl or an EPA-registered surface disinfectant between clients, full wipe-down at end of day. UVC cabinet can finish the surface treatment for handpiece bodies that fit. Don’t forget the back of the handpiece, the cord near the grip, and the underside of the lamp arm — the spots staff actually touch.
Pedicure Tubs (Whirlpool and Pipeless)
Highest-risk equipment in the salon because of residual water in jets and seams. Even with a disposable pedicure liner in place — and you should be using one — the tub still needs between-client cleaning and a full end-of-day protocol with the manufacturer’s recommended disinfectant cycled through the jets. Pipeless designs are easier to clean; older whirlpool jets are not, and many state boards have specific rules. Check the equipment manual, then the state board — they sometimes disagree, and the stricter wins.
Frequency & the Three Cycles You Need to Run
Not all cleaning is between-client cleaning. Build the schedule around three cycles:
- Between every client: the four-step protocol above on every reusable tool that was used. Disposables binned. UVC cabinet run on station surfaces and items between full processes.
- End of day: deep clean on brushes (full residue removal), audit the disinfectant solution (replace if dated, cloudy, or contaminated), wipe down all stations including the parts staff “always touch but never clean” (drawer handles, lamp switches, phone, card terminal), empty and disinfect pedicure tubs through the jets, restock the disposable supply closet.
- Weekly / monthly: deep-clean equipment that isn’t on the daily list — drill handpieces (per manufacturer), wax pots (drain, scrape, refill), UVC cabinet interior (yes, the cabinet itself needs cleaning), inspect tool inventory for damage that creates micro-fissures (cracked plastic, chipped metal). Replace anything you wouldn’t put on your own hand.
Document the cycles. An inspector who sees a posted SOP plus a dated checklist with staff initials is checking a very different box than one who finds neither.
Six Mistakes That Fail Inspections
- Disinfecting before cleaning. Organic matter shields microbes. The label dwell time assumes a pre-cleaned tool.
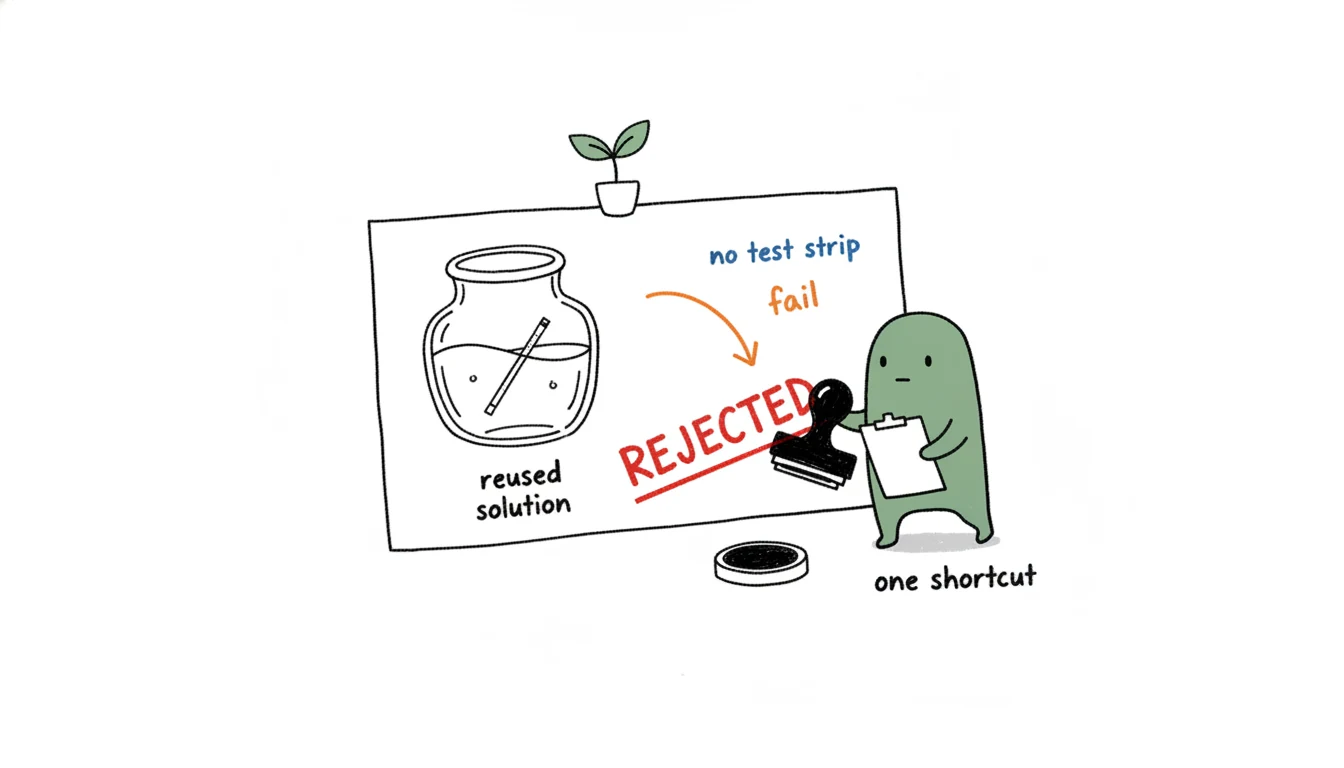
- Re-using the disinfectant solution past its useful life. Most need to be made fresh daily. A cloudy soak isn’t disinfecting anything.
- Treating UVC as terminal sterilization. It’s a surface step. Anything that breaks skin needs heat. See the UV cabinet guide for the framing.
- One set of every tool. If you only own one set of nippers, you can’t run a full sterilization cycle without stopping work. Stock enough sets that one is always in cycle.
- Soaking glued items. Kolinsky and synthetic brushes lose their ferrules. Cuticle pushers with bonded heads can come apart. Read the construction before you immerse.
- “Single-use” items used twice. Files, buffers, orangewood, liners go in the bin. The cost of replacement is lower than the cost of one infection complaint.
Sourcing the SOP — The Supply Closet
The SOP needs the closet to back it. For distributors stocking salons or chain owners building a unified supply plan, three categories matter most:
- Single-use consumables: files, buffers, orangewood, pedicure liners, gloves, table covers — the items that get binned and replaced. Volume drives margin; private-label runs are common at distributor scale. Our disposable nail supplies wholesale range is sized for this.
- Disinfection hardware: UVC cabinets (multi-tray for the back room, portable boxes per chair), ultrasonic cleaners, autoclaves where compliance demands them. Our UV sterilizer range covers the cabinet side; the portable UV sterilizer box and UV cabinet with drying are the two SKUs we lead with.
- Reusable tools sized for rotation: nipper sets, e-file bits, brush sets in quantities that let staff actually run the four-step protocol without stopping work. See the nail brush and nail drill categories.
If you’re sourcing the full closet — consumables, hardware, and reusables — across multiple salon locations, the salon equipment range plus a private-label run on the disposable line is the typical package. Send your spec to our OEM team with target market, branding level, and approximate monthly volume, and we’ll come back with a quote.
Frequently Asked Questions
How often should I clean and disinfect nail tools?
Between every client, without exception. Reusable metal tools — nippers, pushers, tweezers — go through the full clean → disinfect → dry → store cycle after each service. Single-use items (files, buffers, orangewood, pedicure liners) go in the bin, not back in the drawer. At end of day, run a deeper clean on anything that touched product residue (brushes, cuticle pushers with oil buildup), and audit your disinfectant solution — most need a fresh batch daily.
What’s the difference between cleaning, disinfecting, and sterilizing?
Cleaning physically removes debris, oils, and product residue — usually with detergent, water, and a brush. Disinfecting kills most microorganisms on the surface, typically with an EPA-registered hospital-grade liquid or a UVC cabinet. Sterilizing eliminates essentially all microbial life, including spores, and requires heat under pressure (an autoclave) or equivalent. You can’t skip cleaning and expect disinfection or sterilization to work — organic matter shields microbes from both UVC and liquids. The order matters: clean first, then disinfect or sterilize.
Can I use rubbing alcohol to disinfect nail tools?
For a quick wipe-down of low-risk items (a station surface, a closed lamp), 70% isopropyl alcohol is fine. For tools that contact skin — nippers, pushers, anything that could break the cuticle — most state boards in the US and equivalent rules in the EU require an EPA-registered hospital-grade disinfectant with a documented contact time, not just alcohol. Check your local board’s approved list before you build a process around alcohol alone. See our sterilization compliance guide for the jurisdictional details.
Do I need an autoclave, or is a UV cabinet enough?
Depends on what the tool does. For implements that can draw blood or contact broken skin — sharp nippers, cuticle scissors — most jurisdictions require heat sterilization (autoclave or dry-heat). A UV cabinet is a surface step for items handled between clients; it doesn’t penetrate the way pressurized steam does and isn’t a substitute for heat sterilization of critical instruments. The honest stack is: single-use where possible, liquid disinfection for reusable surface tools, UVC as the fast between-client step, autoclave for anything critical. Our UV sterilizer cabinet buying guide covers what UVC does and doesn’t do.
How do I clean a nail brush without ruining the bristles?
For acrylic and gel brushes (especially kolinsky), never soak the ferrule — solvent wicks into the glue and the bristles fall out within weeks. Wipe the bristles with monomer (acrylic) or brush cleaner (gel) on a lint-free wipe, work the residue out with gentle pressure on a paper towel, reshape the tip, and store flat or bristles-down on a brush rest. Detergent and water are for natural-bristle and synthetic body brushes, not for monomer brushes. See our nail brush wholesale range for the kolinsky and synthetic options we supply.
Can pedicure tub liners replace disinfecting the tub?
No — they reduce contact, they don’t eliminate it. Even with a single-use liner, the tub and any non-disposable parts (jets if it’s a whirlpool, footrest, drain) still need cleaning and disinfection between clients. The big advantage of liners is they take the high-risk biofilm reservoir (residual water in jets and seams) off the table and cut your between-client turnaround dramatically. They’re a workflow upgrade, not a compliance shortcut. We supply disposable pedicure liners and the rest of the single-use range to distributors and salon chains.
How do I disinfect e-file (nail drill) bits between clients?
Bits are the most-overlooked item in a salon. Pre-clean immediately after use — brush off dust and product, soak briefly in an enzymatic cleaner or ultrasonic with detergent solution. Disinfect: hospital-grade liquid for the dwell time on the label, or autoclave for carbide bits (most diamond bits also tolerate it — check the manufacturer). UVC is fine as the between-client surface step but isn’t sufficient on its own for sharps. Have at least two sets of every bit you use frequently so one set can run a full cycle while you keep working.
What should be in a salon’s sterilization supply closet?
At minimum: an EPA-registered hospital-grade liquid disinfectant (fresh batch daily, with a dated label), a covered soak container, mechanical brushes for pre-cleaning, lint-free wipes, single-use barriers (gloves, files, buffers, orangewood sticks, pedicure liners), a UVC cabinet for between-client surface treatment, and an autoclave or equivalent for critical instruments. Plus a written SOP posted in the back, training records, and inspection logs. Our disposable nail supplies and UV sterilizer ranges are sized for distributors stocking the consumable + hardware side of that closet.
Building or refreshing your salon SOP? Pair this with our sterilization compliance guide for the regulatory frame and the UV cabinet buying guide for the hardware. To source the consumables and equipment in one quote, browse the disposable nail supplies and UV sterilizer ranges or contact our team directly.
Leave A Comment